Deploy your Node js app into production with Nginx and SSL installation(Step by Step tutorial)
Introduction
In this article, I will easily explain to you How to deploying your node js app for production professionally.
You can use AWS EC2, Digital Ocean or any other hosting platforms as per your requirement. I am using the AWS EC2 instance for this tutorial.
AWS
Amazon Web Services is a very popular and reliable platform to host our application on top of their servers. There are many types of amazon’s services that we can use to host our app, but we will use EC2 (Elastic Compute Service). It is free and provides a very customized configuration during the creation process. We can create an instance: a set amount of resources initialized (OS, disk space, ram, etc).
EC 2
Why EC2? Because it’s free and provide very customizable configurations to the end-user. We can select our favourite Linux based operating system and install all the required utilities and software on that OS.
Steps That we follow:
- Create an Account on Aws
- Launch an EC2 Instance
- SSH into your instance
- Setup instance for running node app
- Install Node js
- Clone your project repository from GitHub
- Test your app
- Setup for production
- Setup PM2 for keeping your app running
- Setup ufw Firewall
- NGINX Installation and configuration
- Add domain Name (Optional)
- Add SSL with LetsEncrypt
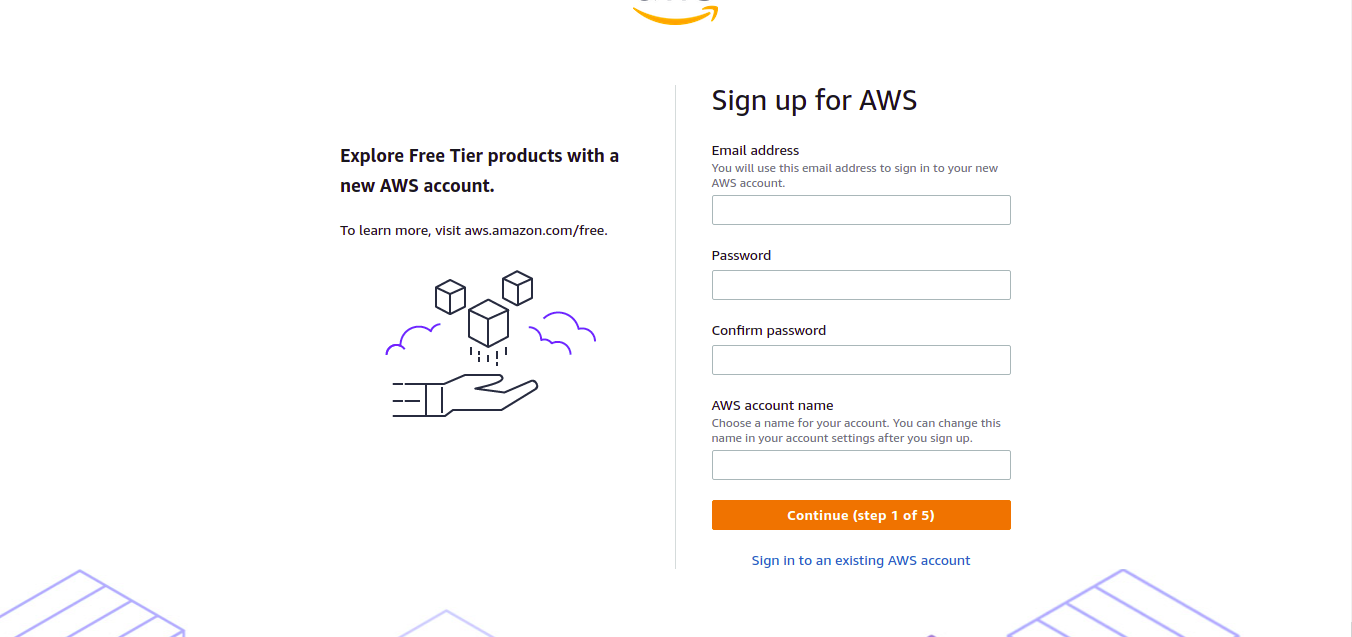
1. Create an Account on AWS.
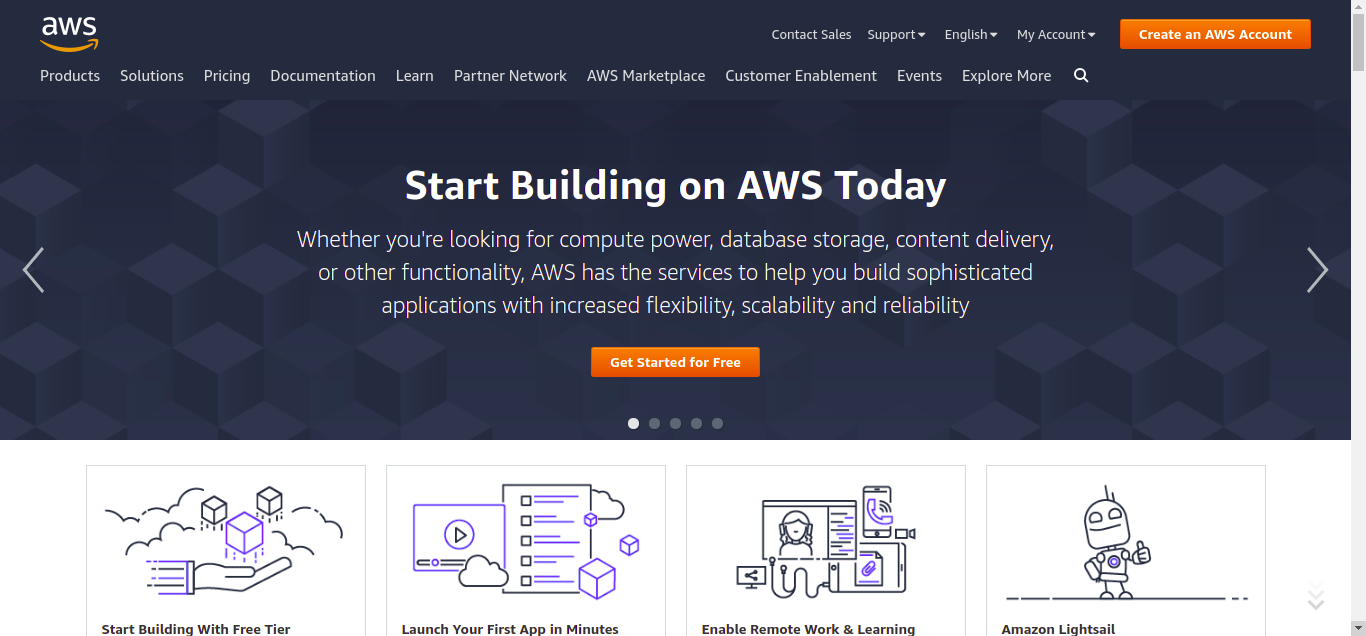
Go to https://aws.amazon.com/ and create a new AWS account. If you have already registered login to your AWS console. A new account will get a free tier of Amazon EC2, Amazon S3 and Amazon DynamoDb services for 12 months.
Choose Personal Account type and provide the required information
2. Launch an EC2 Instance.
If you complete the previous step you will redirect to the AWS console. You can see AWS services under the AWS Services section. Click on the EC2 under Compute or Seach on the search bar on the top of the console. Then it will open the ec2 dashboard page
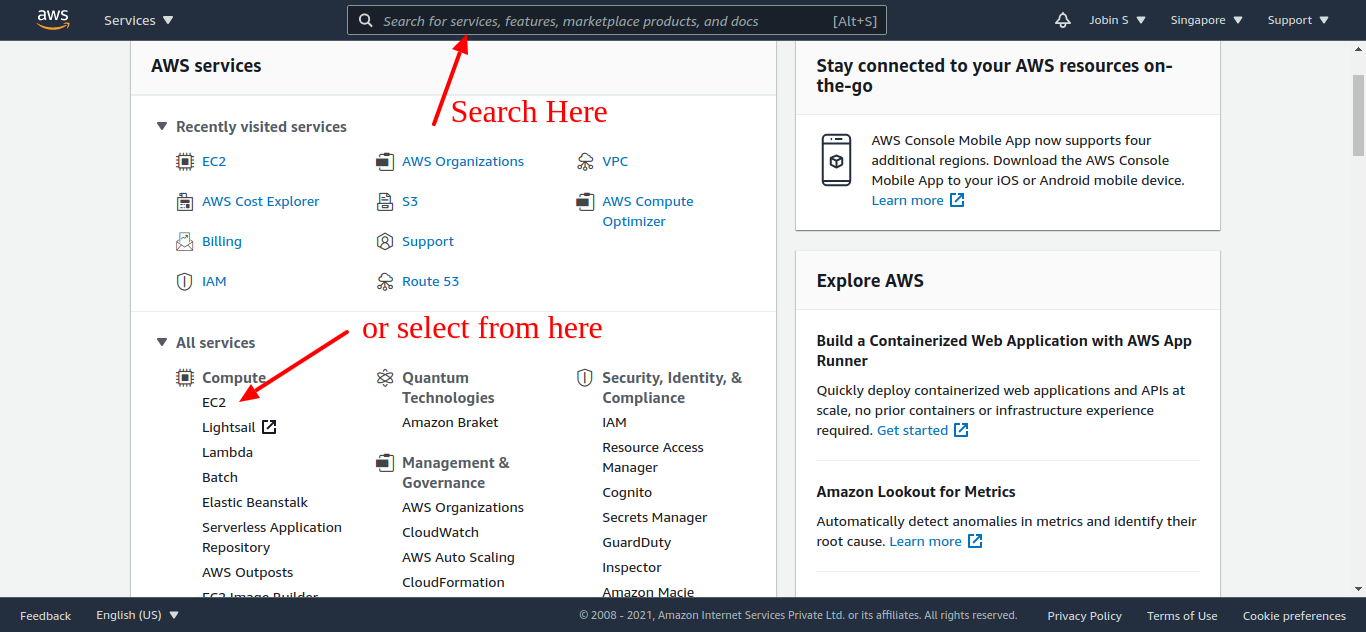
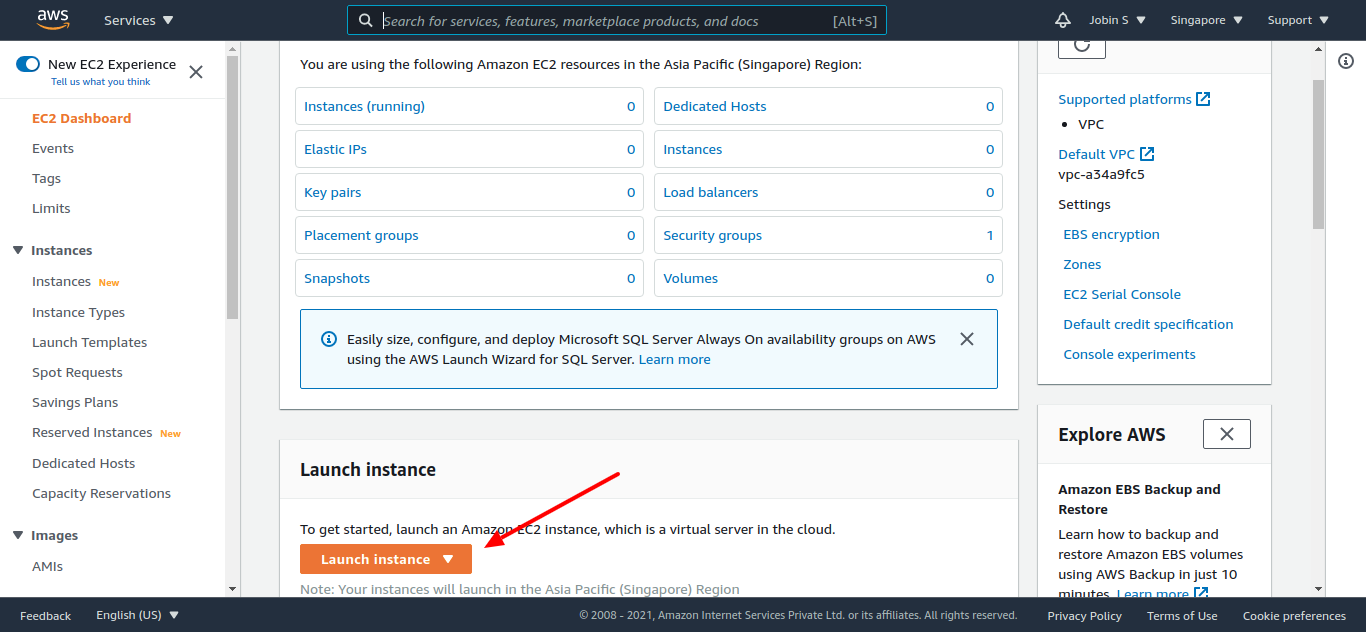
On the opened page click on the Launch instance button under the create instance section.
On the next page, you need to configure your AWS EC2 Instance.
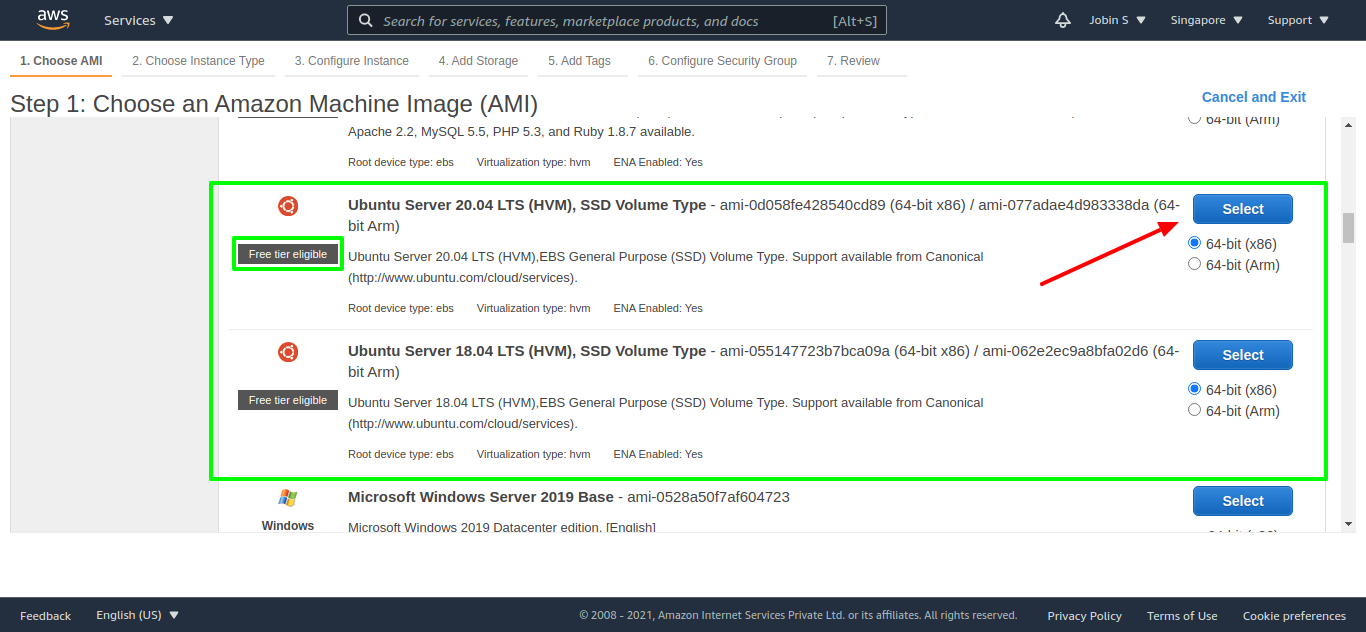
Step 1: Choose an Amazon Machine Image (AMI)
An AMI is a template that contains the software configuration (operating system, application server, and applications) required to launch your instance.
Click the Select button of Ubuntu Server 20.04 LTS (HVM), SSD Volume Type
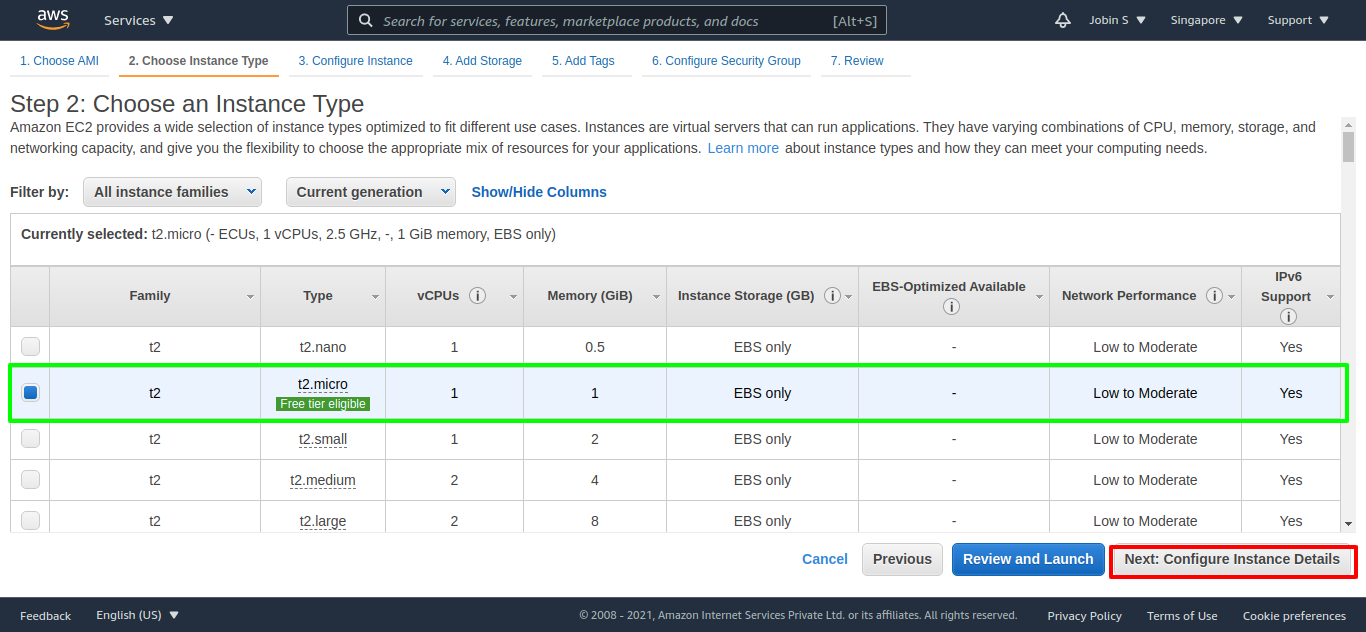
Step 2: Choose an Instance Type
Amazon EC2 provides a wide selection of instance types optimized to fit different use cases. Instances are virtual servers that can run applications. They have varying combinations of CPU, memory, storage, and networking capacity, and give you the flexibility to choose the appropriate mix of resources for your applications. You can select any different instances as your use cases Learn more about instance types and how they can meet your computing needs.
Select t.micro which is eligible for a free trial and click next button
Step 3: Configure Instance Details
Configure the instance to suit your requirements. You can launch multiple instances from the same AMI, request Spot instances to take advantage of the lower pricing, assign an access management role to the instance, and more.
Keep all the values as default and click next.
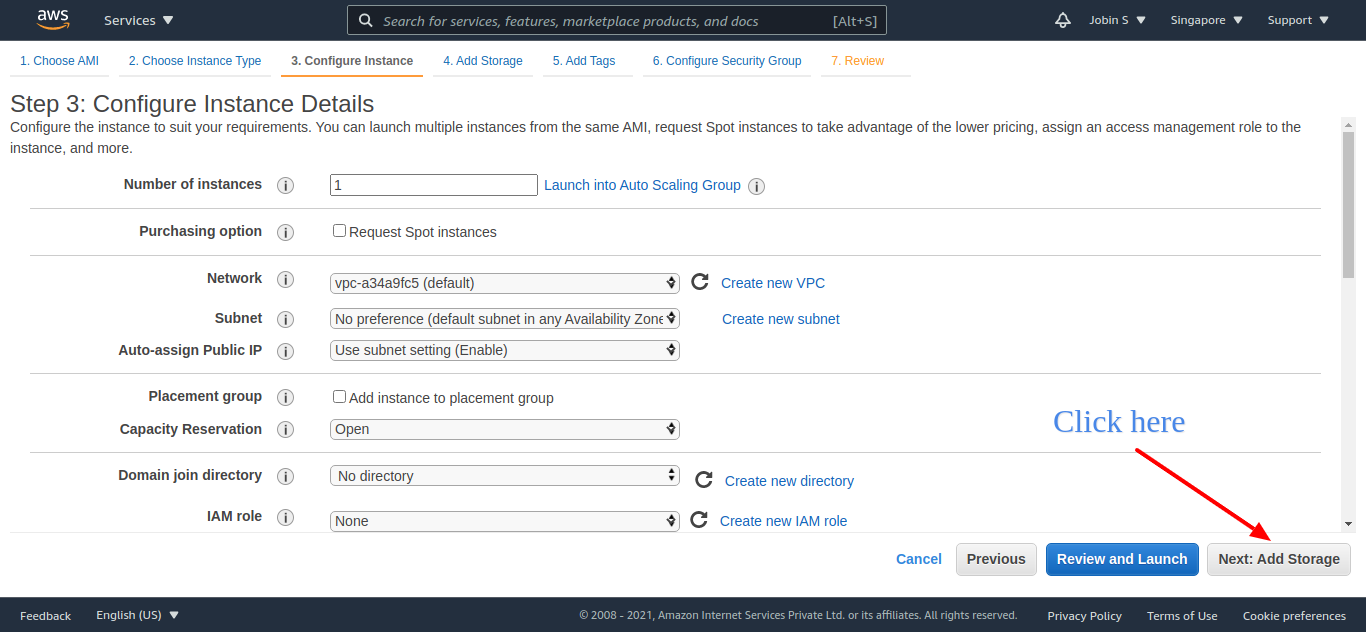
NB: You can edit these default fields as you need in your cases
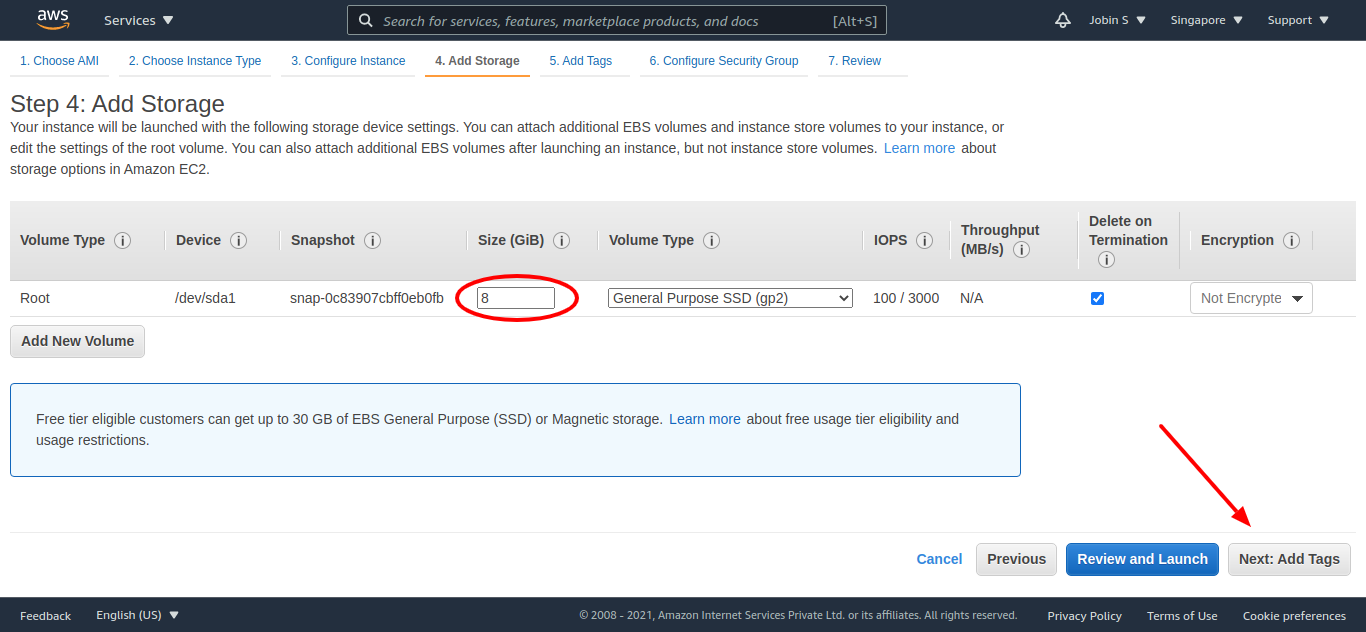
Step 4: Add Storage
You can attach additional EBS volumes and instance store volumes to your instance, or edit the settings of the root volume. You can also attach additional EBS volumes after launching an instance, but not instance store volumes. Learn more about storage options in Amazon EC2.
Select volume size and type as need and click next and skip the add tag section by clicking the next button once more. Here I have selected the following.
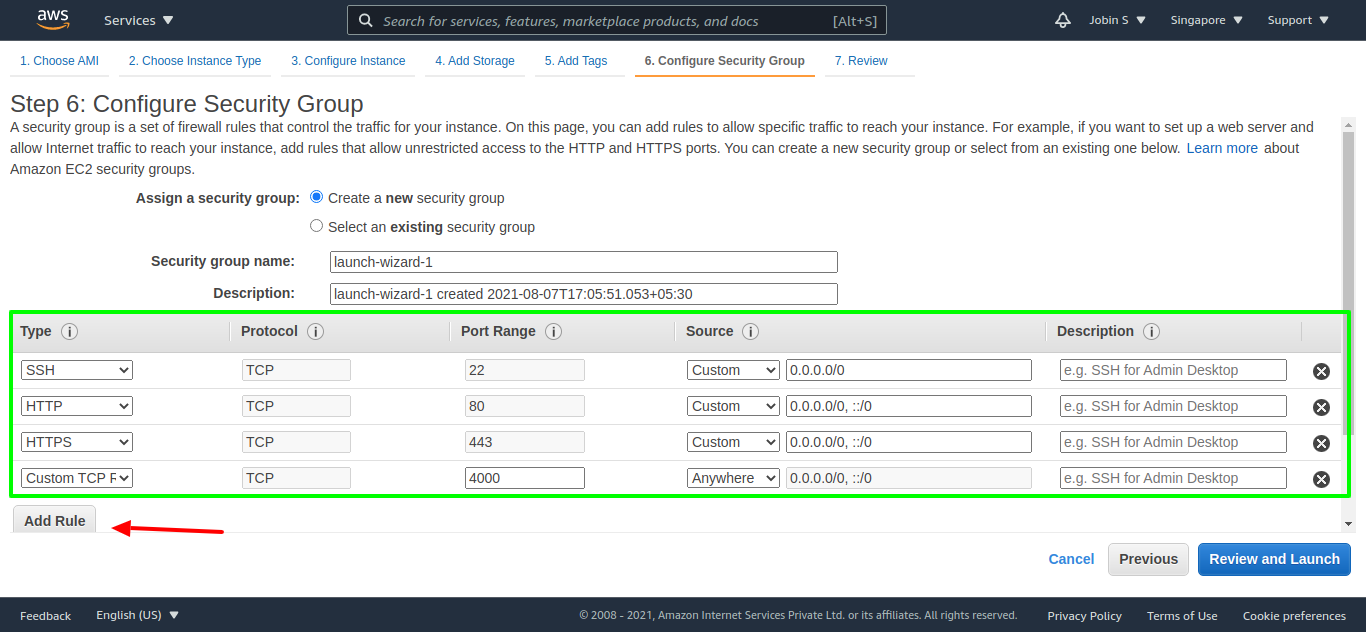
Step 6: Configure Security Group
A security group is a set of firewall rules that control the traffic for your instance. On this page, you can add rules to allow specific traffic to reach your instance. For example, if you want to set up a web server and allow Internet traffic to reach your instance, add rules that allow unrestricted access to the HTTP and HTTPS ports. You can create a new security group or select from an existing one below. Learn more about Amazon EC2 security groups.
Click on Add Rule and set up HTTP, HTTPS & Custom TCP rule and type its source IP to the following IP.
0.0.0.0/0, ::/0
This will allow access to use the app anywhere in the internet world. We need to set up security stuff here as our node app security case. Then click review and launch.
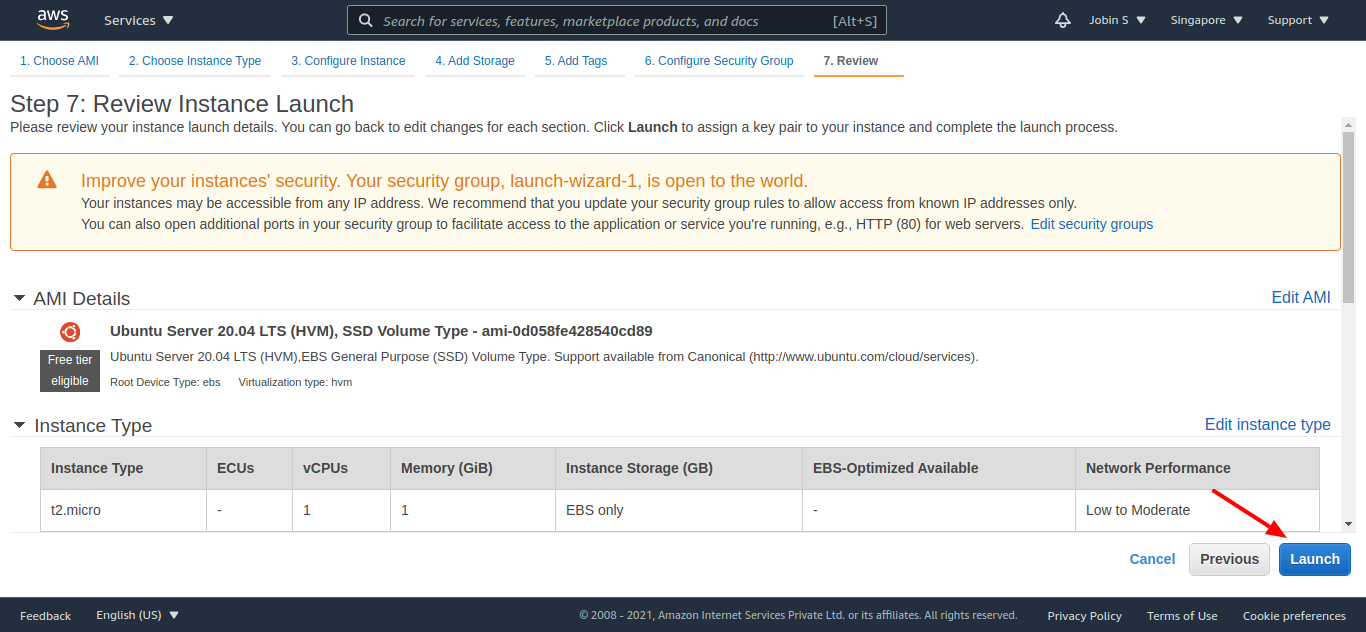
Step 7: Review Instance Launch
In this section you can review your instance setups that we have done up to here.
Click Launch to assign a key pair to your instance and complete the launch process.
Final Step
A key pair, consisting of a public key and a private key, is a set of security credentials that you use to prove your identity when connecting to an EC2 instance
Select create new key pair on the pop and enter a name for the key pair and click launch. And all set now you can click view instance and deploy your app on EC2 instance.

3. SSH into your instance
Using your pem key pair ssh into the EC2 Instance.
4. Setup instance for running node app
Install node/NPM
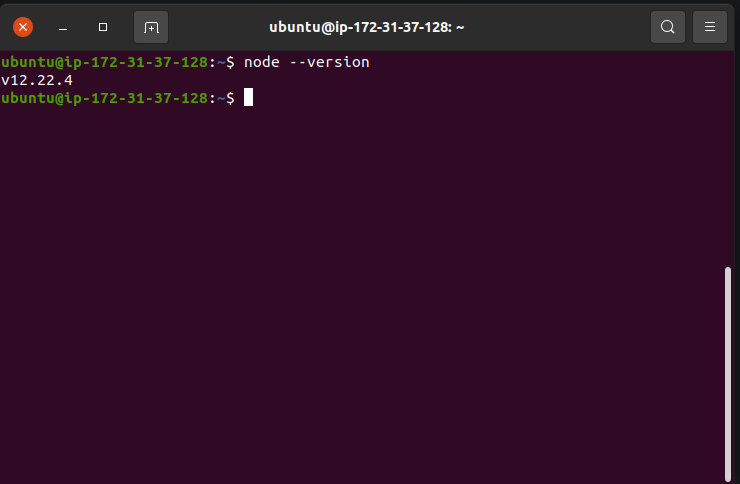
Enter the following in the terminal to install node
curl -sL https://deb.nodesource.com/setup_12.x | sudo -E bash -

sudo apt install nodejs

node --version
Clone your project repository from GitHub
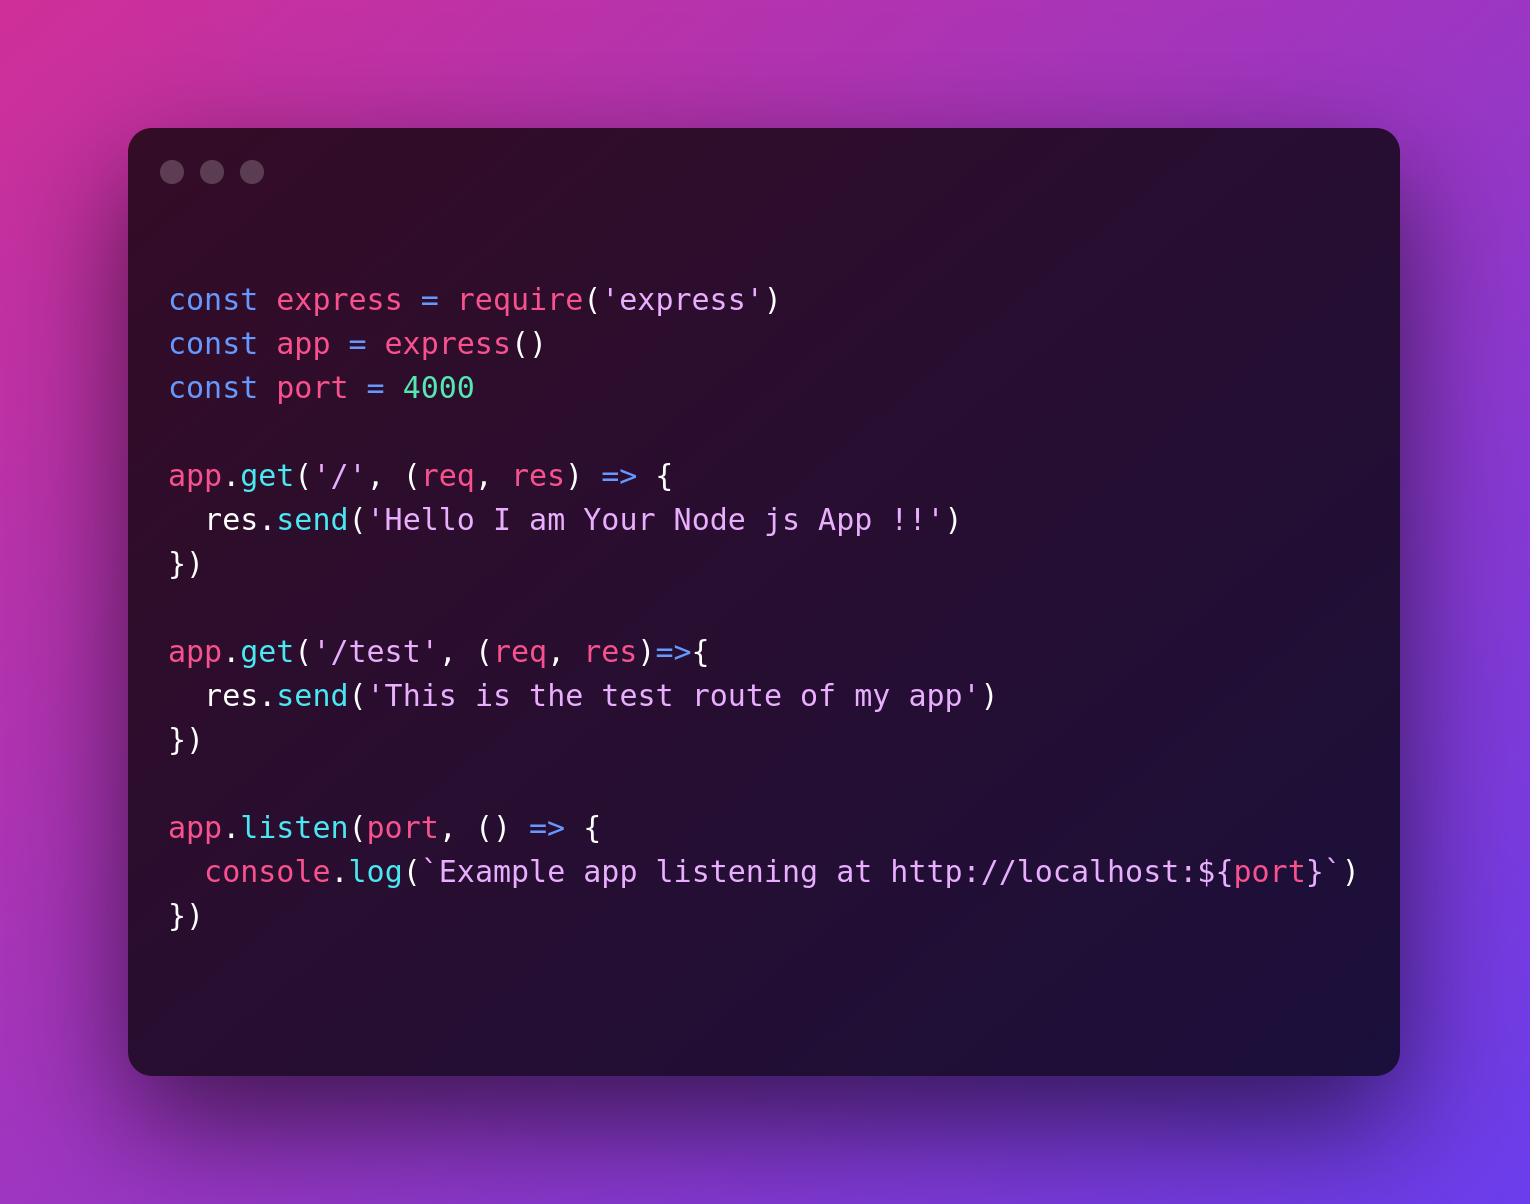
git clone yourproject.git
This is the code I am using here to deploy
5. Test your app
Install dependencies
cd yourproject
npm install
npm start (or whatever your start command)
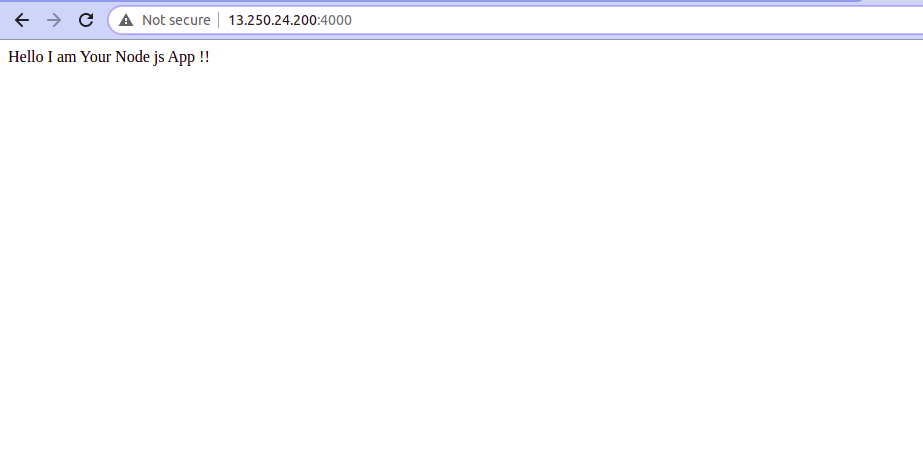
Check app on web
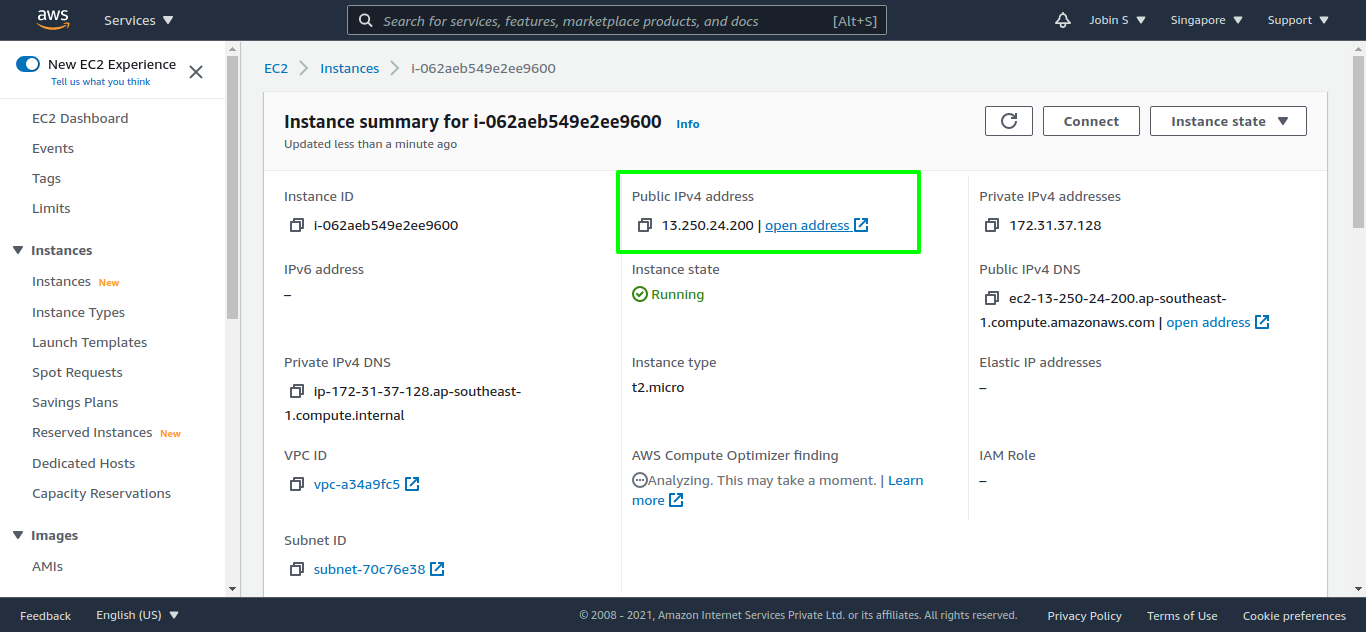
Get your instance IPv4 address from the AWS console and test the URL.
http:<ipv4>:<port>
For example: If your IPv4 address is 11.222.33.444, And app running on PORT : 4000 you need to browse http:11.222.33.444:4000
Stop the node app
# stop app
ctrl+C
Setup for production
👉 Setup PM2 process manager to keep your app running
sudo npm i pm2 -g
pm2 start server.js (or whatever your file name)

# To make sure app starts when reboot
pm2 startup ubuntu
The below are other commands of PM2
# Other pm2 commands
pm2 show app
pm2 status
pm2 restart app
pm2 stop app
pm2 logs (Show log stream)
pm2 flush (Clear logs)
👉 Setup ufw firewall
sudo ufw enable
sudo ufw status
sudo ufw allow ssh (Port 22)
sudo ufw allow http (Port 80)
sudo ufw allow https (Port 443)
9. NGINX Installation and configuration
sudo apt install nginx

sudo nano /etc/nginx/sites-available/default
The above command will open file: /etc/nginx/sites-available/default in nano text editor.
Remove the following block of code from the file
location / {
                # First attempt to serve request as file, then
                # as directory, then fall back to displaying a 404.
                try_files $uri $uri/ =404;
        }
And Add these Lines there
 server_name yourdomain.com www.yourdomain.com;

    location / {
        proxy_pass http://localhost:4000; #whatever port your node app runs on
        proxy_http_version 1.1;
        proxy_set_header Upgrade $http_upgrade;
        proxy_set_header Connection 'upgrade';
        proxy_set_header Host $host;
        proxy_cache_bypass $http_upgrade;
    }
Then press ctrl + x and enter key then press ctrl + c to save the file.
# Check NGINX config file syntax
# (If you fail in this step that means you have not correctly edited the Nginx config file)
sudo nginx -t

# Restart NGINX
sudo service nginx restart
Now you can view your node app on your instance IPv4 without the usage of port in the end. Now its time to setup domain name (optional)
http:<IPv4>

# example
http:11.222.33.444
9. Add domain Name
Adding a domain name is not rocket science you can do that in simple steps.
- Purchase a domain name from Godaddy or any other domain provider
- Add an A record that points to your IPv4
Now node app is accessble at yourdomain.com
10. Add SSL with LetsEncrypt
sudo add-apt-repository ppa:certbot/certbot
sudo apt-get update
sudo apt-get install python-certbot-nginx
sudo certbot --nginx -d yourdomain.com -d www.yourdomain.com

# Only valid for 90 days, test the renewal process with
certbot renew --dry-run
Now you should see your app on https://yourdomain.com
If you have enjoyed this article and hosted your app successfully feel free to support me by like, comment and share.